
How to create a package
A package combines multiple products into a single, new product, offering a convenient way to present bundled offerings. Watch the video or read the steps below to learn how to create these valuable packages quickly and efficiently.
Create Package Items
In this walkthrough, I am going to set up a package with (2) 8x10 products and 1 Full Resolution Digital Download product to make a package.
Before you can create a Package, each of the individual items within the package must already be created. If you have not yet created those products, you can learn how to create a standard product in Sunshine Photo Cart first.
Creating the Package Product
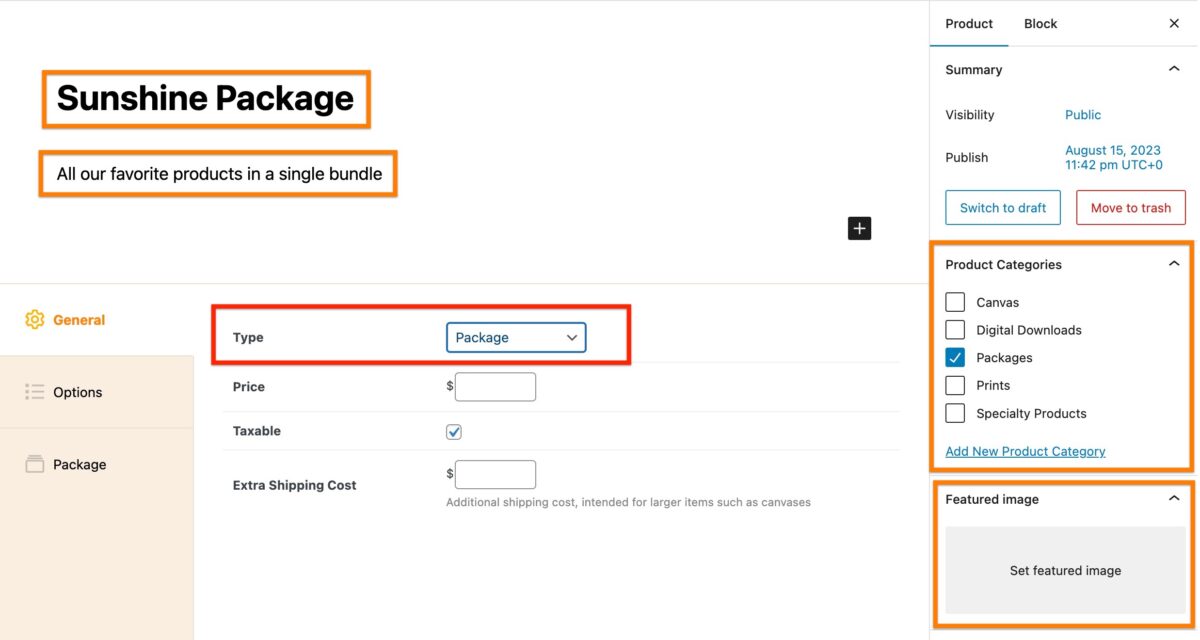
The process of creating a package product is very similar to creating a standard product. Enter your package name, an optional description, select a category, and optionally set a Featured Image.
Most importantly, for Product Type you want to select "Package".
Assigning Products to Package
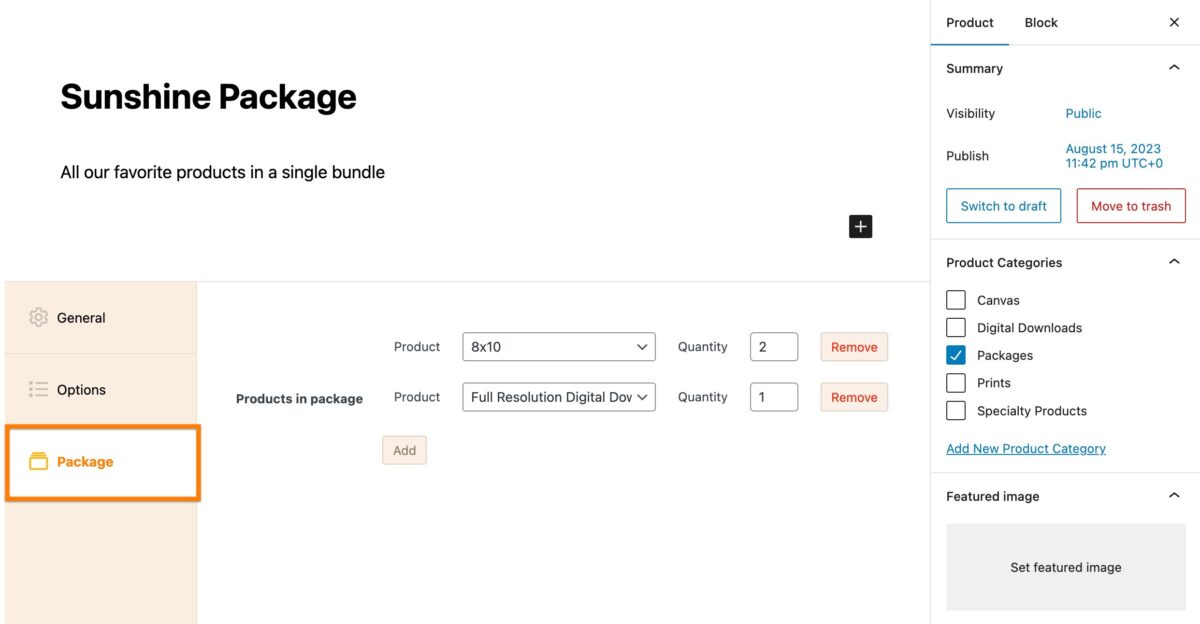
After setting the Product Type to "Package", a new "Package" tab will appear. Click the tab.
Click on the "Add" button. You can then select from the dropdown menu the product to be included in your package and set the quantity.
You can include as many items in a package as you want, continue clicking the "Add" button and entering products + quantity as needed.
If you have the Video Sales add-on installed, your video download products appear in this same dropdown and can be added as package items. When a customer fills a video slot, they are only shown images that have a video attached to them. See Video Sales for more.
Choosing Which Galleries Customers Can Pick From
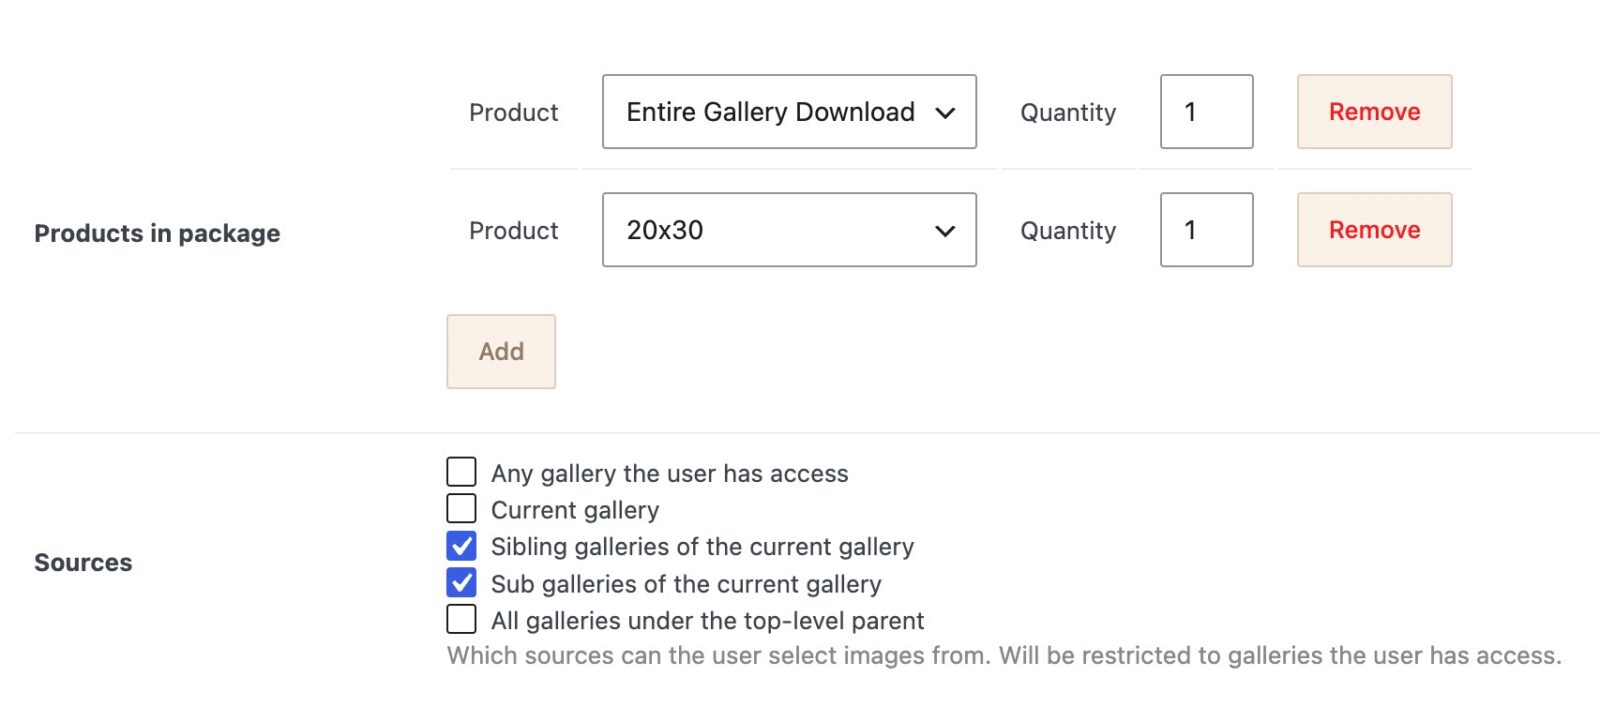
Below the product list on the Package tab is the Sources option. This is where you decide which galleries a customer can pull images from when they fill in their package.
Customers will only ever see galleries they already have access to. The Sources setting narrows that list down further based on where they are when they add the package to their cart.
You can check more than one option. The allowed galleries for the package will be every gallery that matches any of the boxes you've checked.
- Any gallery the user has access — No restriction beyond their normal access. Good when you want a package a customer can fill from anywhere in your store, like a general "Favorites Print Package" that pulls from any session the client is in.
- Current gallery — Only the gallery the customer is viewing when they add the package. Good for per-session packages, where each event stays self-contained and you don't want images mixed across events.
- Sibling galleries of the current gallery — The current gallery plus any other gallery sharing its parent. Useful when a shoot is broken into multiple galleries at the same level (for example, a wedding split into "Ceremony," "Reception," and "Portraits" under a single wedding parent gallery) and you want customers to be able to pick across those siblings.
- Sub galleries of the current gallery — Every gallery nested beneath the current gallery. Useful when you present a high-level gallery (like a whole event) and want the package to pull from any of the child galleries inside it.
- All galleries under the top-level parent — Walks up from the current gallery to the very top of its tree, then includes every gallery under that root. Useful for deeply nested setups: a sports league with teams, and each team with individual player galleries. A family buying a package from a child's gallery can pick images from any other team or player gallery within the same league root.
If you leave Sources unchecked entirely, the package falls back to "any gallery the user has access" by default.
Still need help?
If you have not yet found your answer in the documentation articles, please contact support