Setting up product options
Options allow you to make your products customizable for customers. You can add any kind of option you want to a product such as paper type for prints, additional frames, or offer photo retouching.
Watch the video or read the step-by-step instructions below to learn how to set up product options in your client photo galleries with Sunshine Photo Cart:
Setting Up Options
The first step is to create the collection of product options and the items for customers to choose.
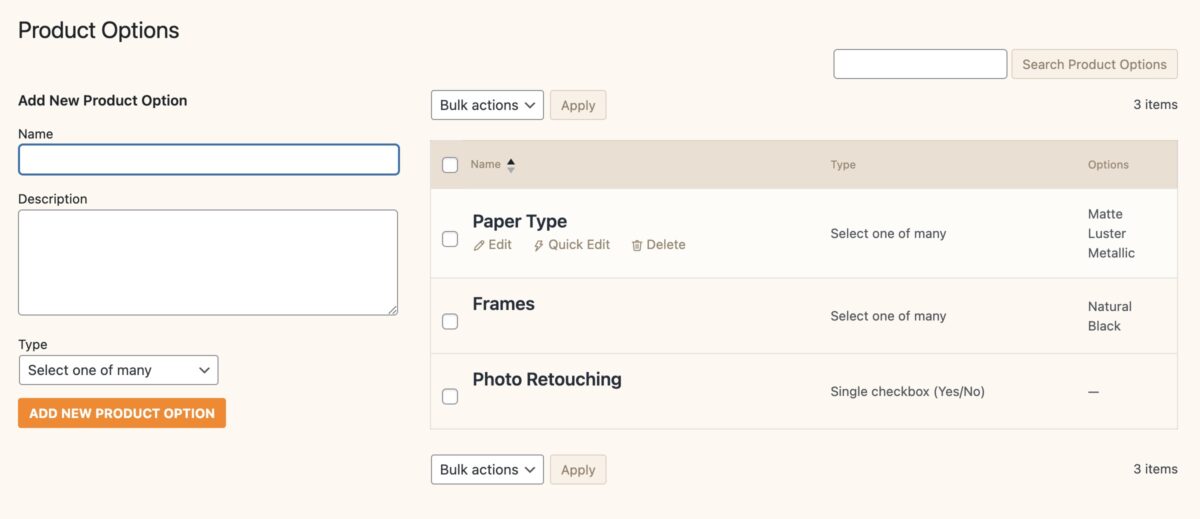
- Go to Products > Product Options
- Under "Add New Product Option", enter a Name, optional description, and select the Type.
- Click "Add New Product Option"

Product Option Types
Select one of many
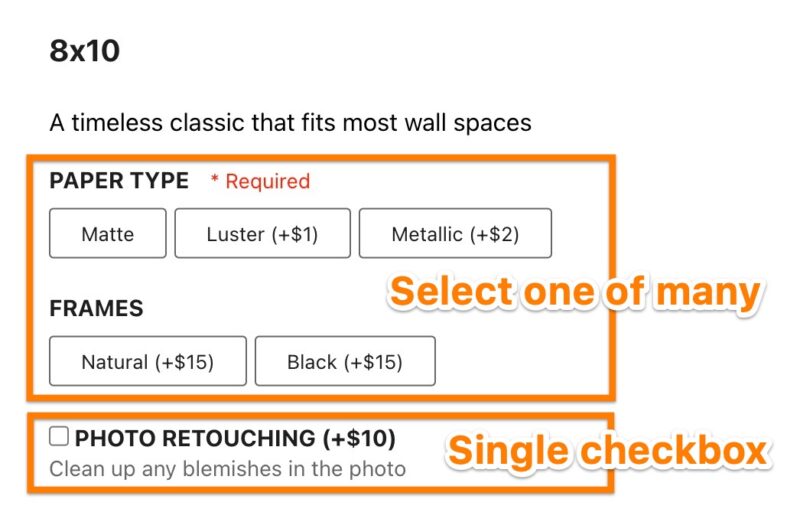
One of many creates an option where the user is presented several different selections and can choose one of them. Some examples would be Paper Type or Frames.
Single checkbox (Yes/No)
This is a simple toggle for users to check and acts as a simple yes or no selection.

Configuring Option Items
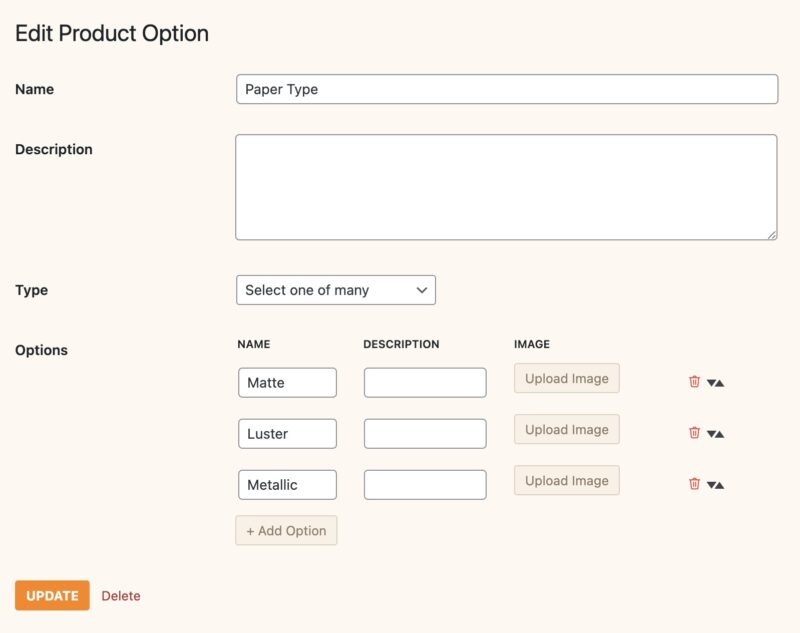
Once your options are set up, we need to configure the option items for each. Hover over the Product Option you want to and click "Edit".
You can create unlimited option items. Let's use Paper Type as an example and create 3 different option items: Matte, Luster, Metallic.
Click on the "+Add option" button and enter a name, optional description, and optional image.
Once added, you can click on the arrows for each item and drag and drop them in the order you want them shown.

Sorting Product Options
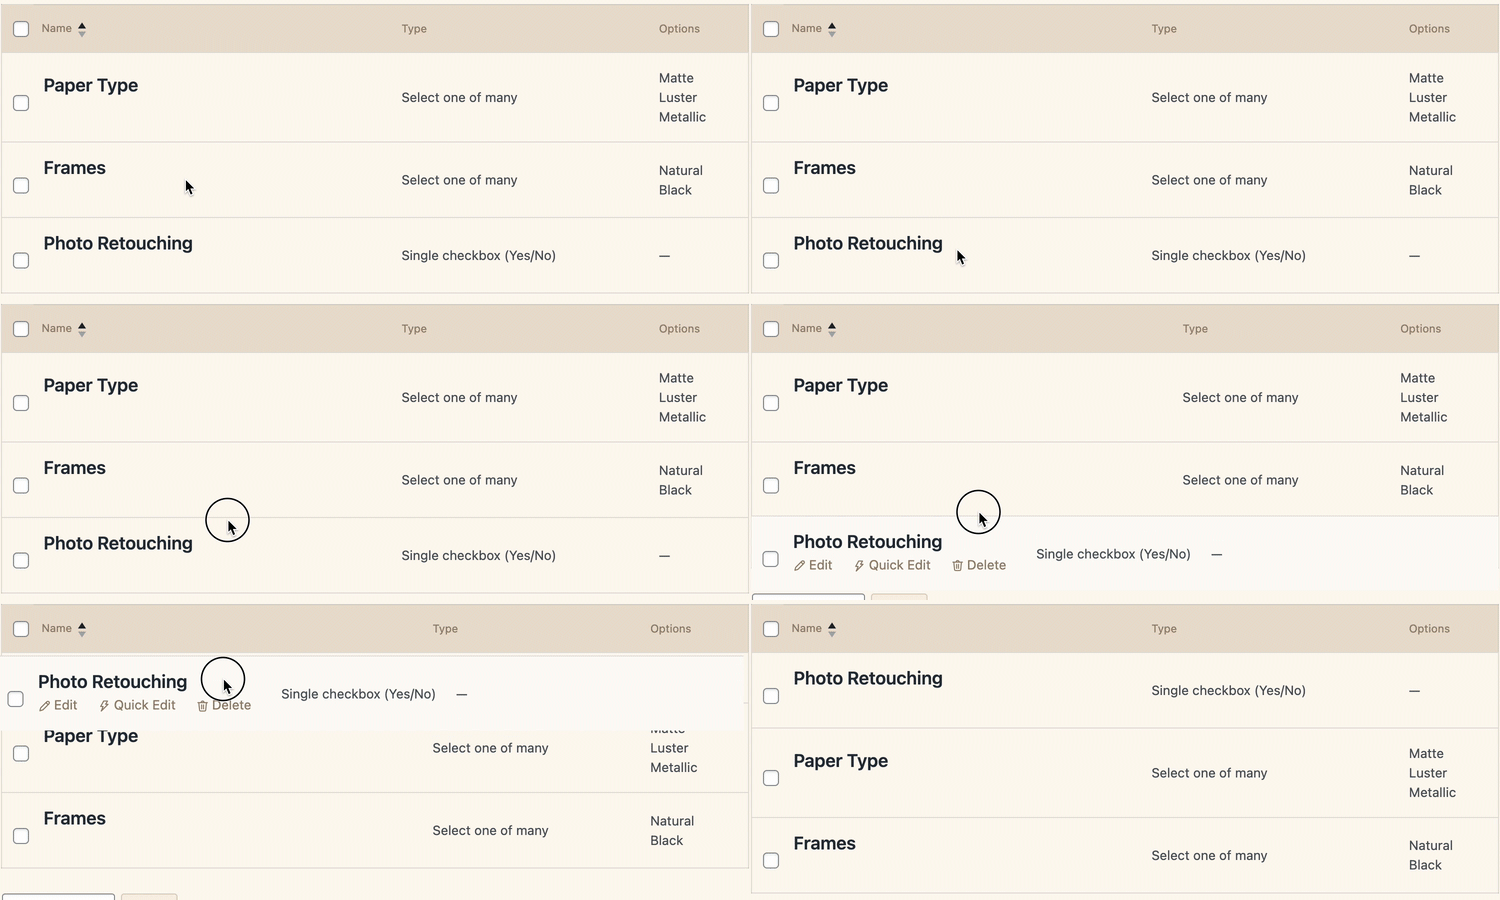
Each Product Option can be sorted by clicking on it's row and dragging and dropping it in the order you want.

Customizing the display of product options
While there are no additional admin settings to configure the display of the product options, the layout can be heavily customized with some CSS. If you need further help customizing, you can reach out to support.
Still need help?
If you have not yet found your answer in the documentation articles, please contact support
