
Setting up Square
With the Square payment gateway add-on, you can allow your customers to pay for orders using your Square account.
Square is part of the core, free plugin and has platform fees. When you upgrade to the paid Square add-on, all platform fees are removed.
Configuring Square in Live/Production Mode
- Go to Sunshine > Settings > Payments > Square
- Optionally enter a custom name and description to show customers on the Checkout page
- Select "Live" for the "Mode" option
- Click the "Connect" button
- Login to your Square account
- Select which "Location" you would like to use
Configuring Square in Test Mode
Unfortunately Square does not have as easy a method to connect in test mode. You will need to create a Developer account.
- Go to Square Developer and create an account if you do not yet have one
- Add a new Application
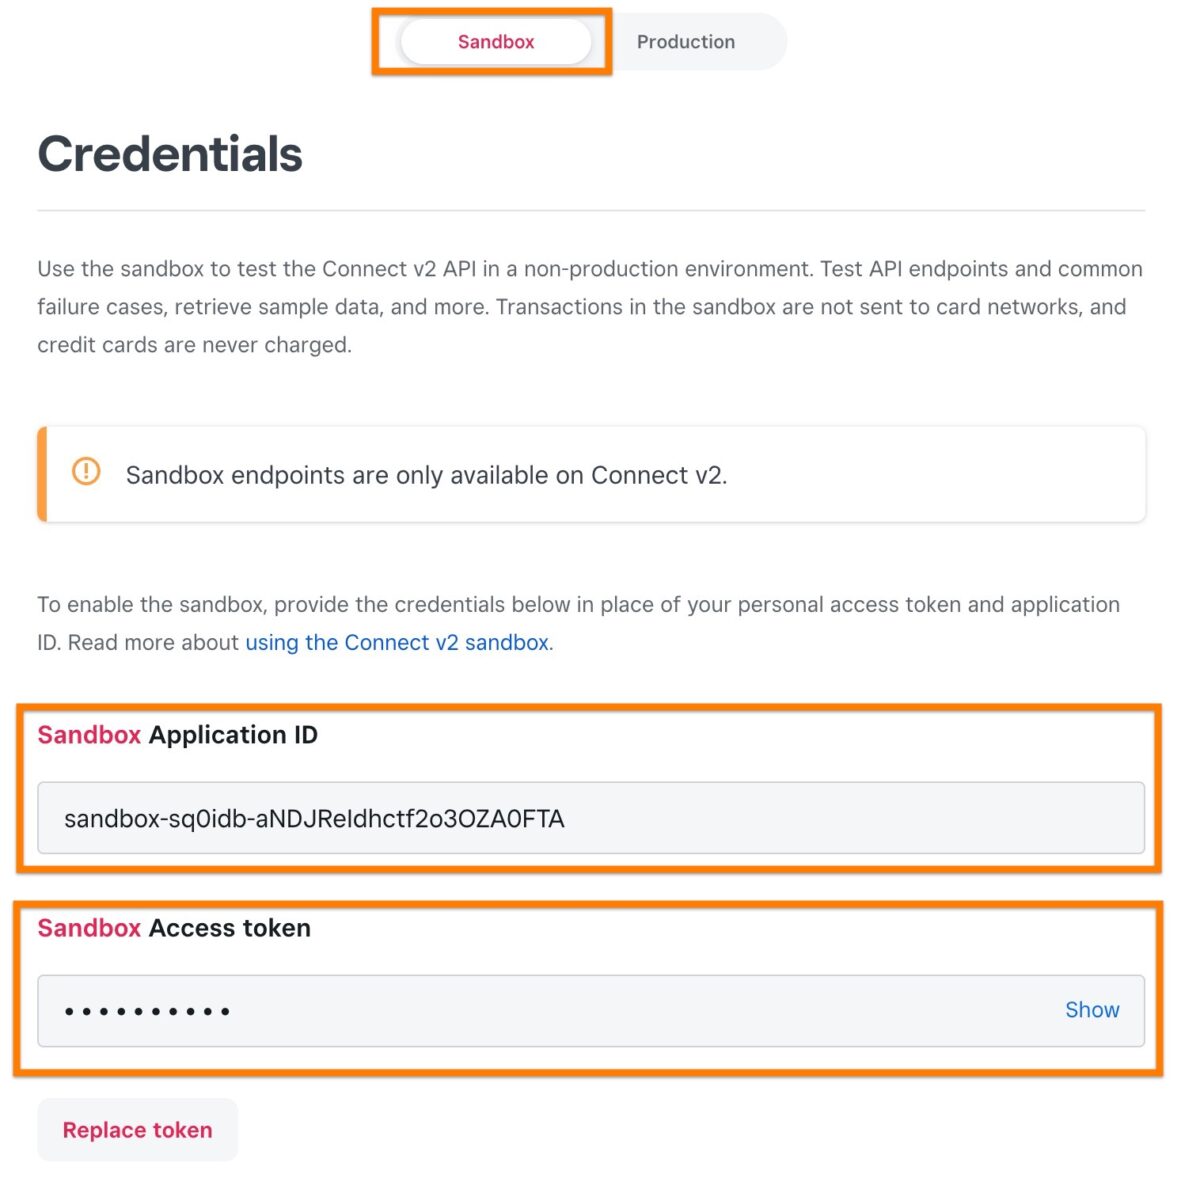
- Make sure you have the "Sandbox" tab selected at the top
- Copy the "Application ID" and "Access Token" into the relevant Sunshine Photo Cart settings
How Square Orders Are Recorded
Each Square charge is itemized with the same line items, tax, shipping, and discounts shown on the Sunshine order. The Sunshine order number is also passed to the Square transaction, so you can quickly match a Square payment to its Sunshine order from inside the Square Dashboard.
When a payment completes, Sunshine pulls the card brand, last 4 digits, and expiration date back from Square and stores them on the order so you can see at a glance how the customer paid.
Square Processing Fees
After a payment settles, Sunshine fetches the actual Square processing fee for that order and saves it. Fees refresh automatically once per day to catch payments that hadn't fully settled at the time of purchase.
With the Exports add-on, Square fees appear as their own column on the order export so you can reconcile your earnings without having to log into Square.
Refunds
You can issue refunds to a Square payment directly from the order screen in your WordPress admin.
- Open the order in Sunshine > Orders
- In the Order Actions panel, choose Refund payment in Square
- Choose a full refund or enter a partial amount
- Optionally email the customer about the refund
- Click Submit
The order status updates to "Refunded" once the refund is issued.
Still need help?
If you have not yet found your answer in the documentation articles, please contact support