
How to customize invoices
Customization is a key feature of Sunshine Photo Cart, right down to invoices. The default layout of invoices is intended to be short, concise, and printable. However, I know all too well many photographers have specific needs or wants for how things should work in their WordPress client photo galleries.
When customizing an invoice, you can:
- Add a logo and custom content
- Replace the entire template file to have 100% control
- Add custom content via hooks
- Add custom CSS
Adding a logo and custom content
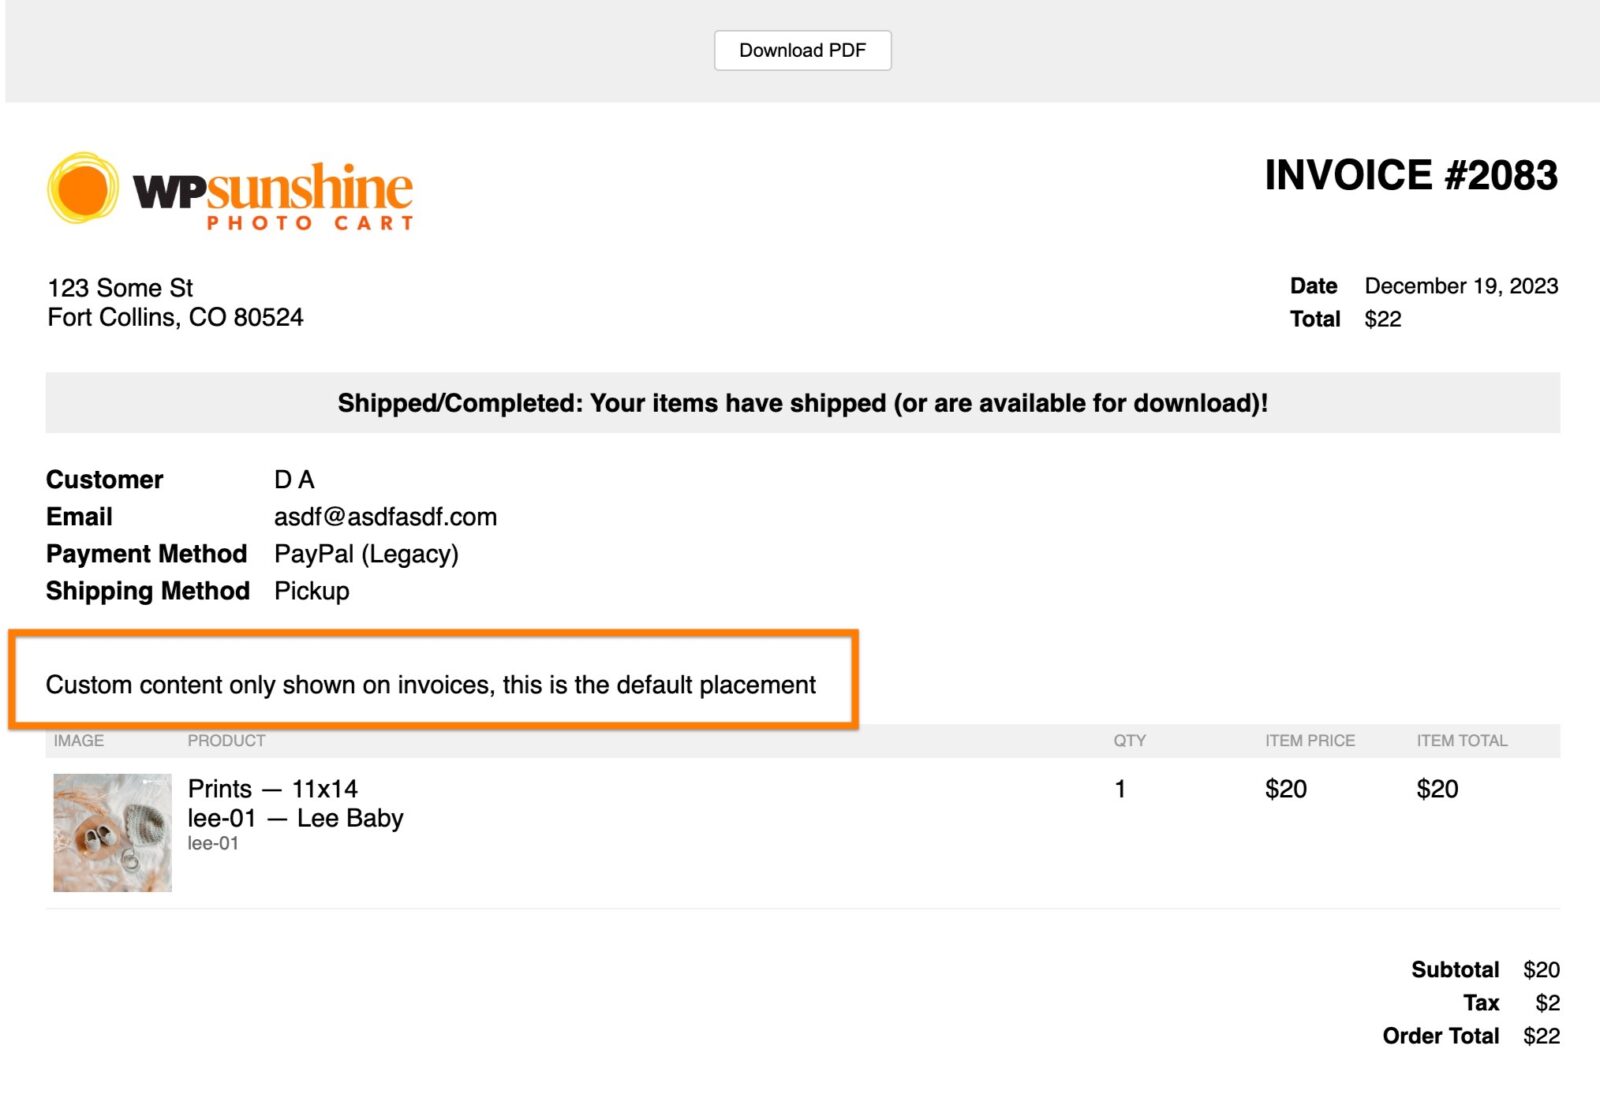
If you go to Sunshine > Settings > Design > Invoices, there are options which allow you to upload a custom logo just for invoices and also a visual editor for any kind of custom content you would like. The logo will be displayed at a maximum of 50px to help ensure the invoice is as short and concise as possible to print on a single page. The custom content appears by default between the general invoice data and the order line items as shown below, but can be moved via a small code snippet.
Replace the entire template file
Sunshine Photo Cart has a simple way to allow photographers to replace any template file and to make it 100% customized via template overrides. Basically, include a copy of the template file within your theme and Sunshine Photo Cart will use your custom copy instead of the default. Just note that once you use a custom template file, you are responsible for ensuring it is up-to-date and works with the latest versions of Sunshine Photo Cart. Learn more about how to create a custom template override.
Adding custom content via hooks
WordPress is entirely built on hooks which allow plugins and themes to customize looks and functionality as needed and Sunshine Photo Cart is no different. The benefit of using hooks instead of replacing the entire template is it will be more future proof. Instead of replacing the entire template file, you only add the content you need where you need it.
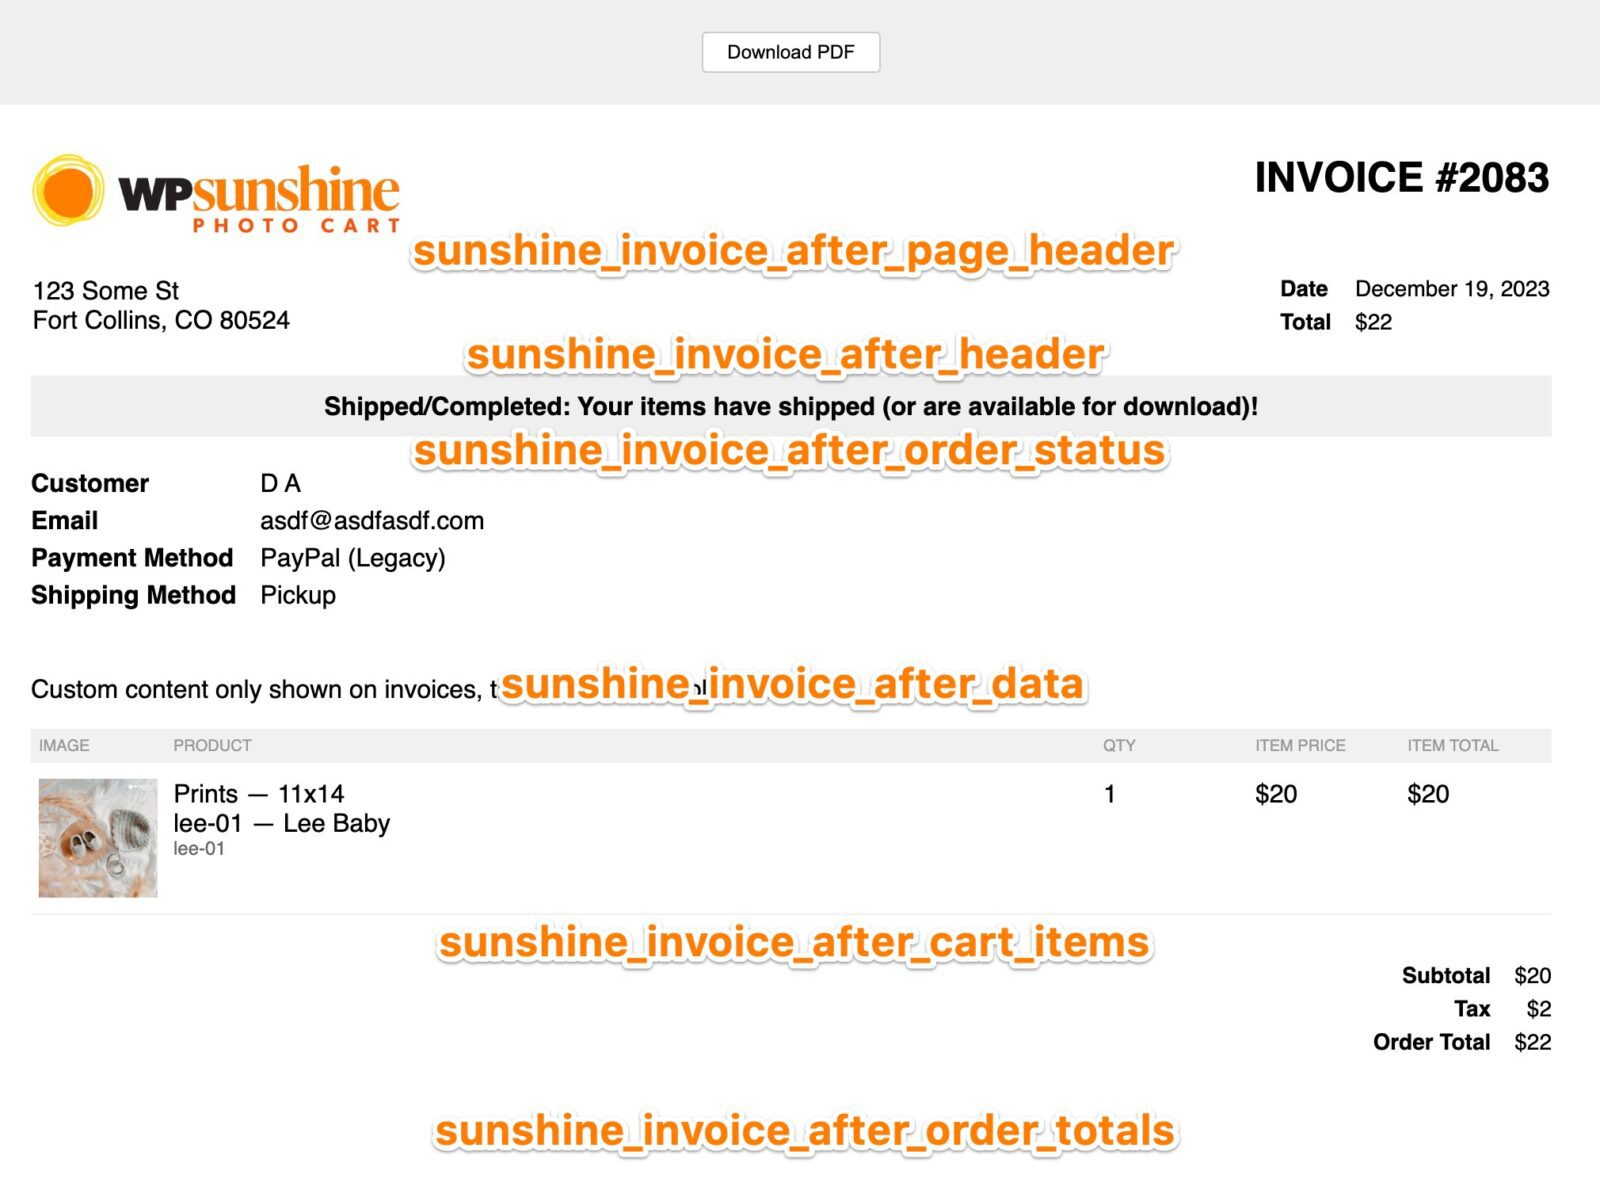
Invoices have the following hooks available:
- sunshine_invoice_after_page_header
- sunshine_invoice_after_header
- sunshine_invoice_after_order_status
- sunshine_invoice_after_data
- sunshine_invoice_after_cart_items
- sunshine_invoice_after_order_totals
Here is where those hooks will output content:
Here is a sample code snippet on how to add custom content after the header:
add_action( 'sunshine_invoice_after_header', 'sunshine_custom_invoice_header' );
function sunshine_custom_invoice_header( $order ) {
	echo 'Display your custom content here';
}
Learn how to add this custom code to your WordPress website
Here is a sample code snippet on how to change the position of the default custom content to the end of the invoice:
add_action( 'init', function() {
	remove_action( 'sunshine_invoice_after_data', 'sunshine_invoice_custom_content' );
	add_action( 'sunshine_invoice_after_order_totals', 'sunshine_invoice_custom_content' );
});
Learn how to add this custom code to your WordPress website
Add custom CSS
Sunshine Photo Cart allows you to add custom CSS anywhere in your client photo galleries and it also applies to invoices as well! With custom CSS, you can change the fonts, colors, or any design aspect of your invoices. In the below example, the address font size in the header is increased to 22px:
#sunshine--invoice--address { font-size: 22px; }Learn how to add this custom code to your WordPress website
Still need help?
If you have not yet found your answer in the documentation articles, please contact support