
How to use the message add-on
The Messaging add-on helps create templated emails which simplifies the process of sending customer emails about their client photo galleries. There are currently two different emails you can manage:
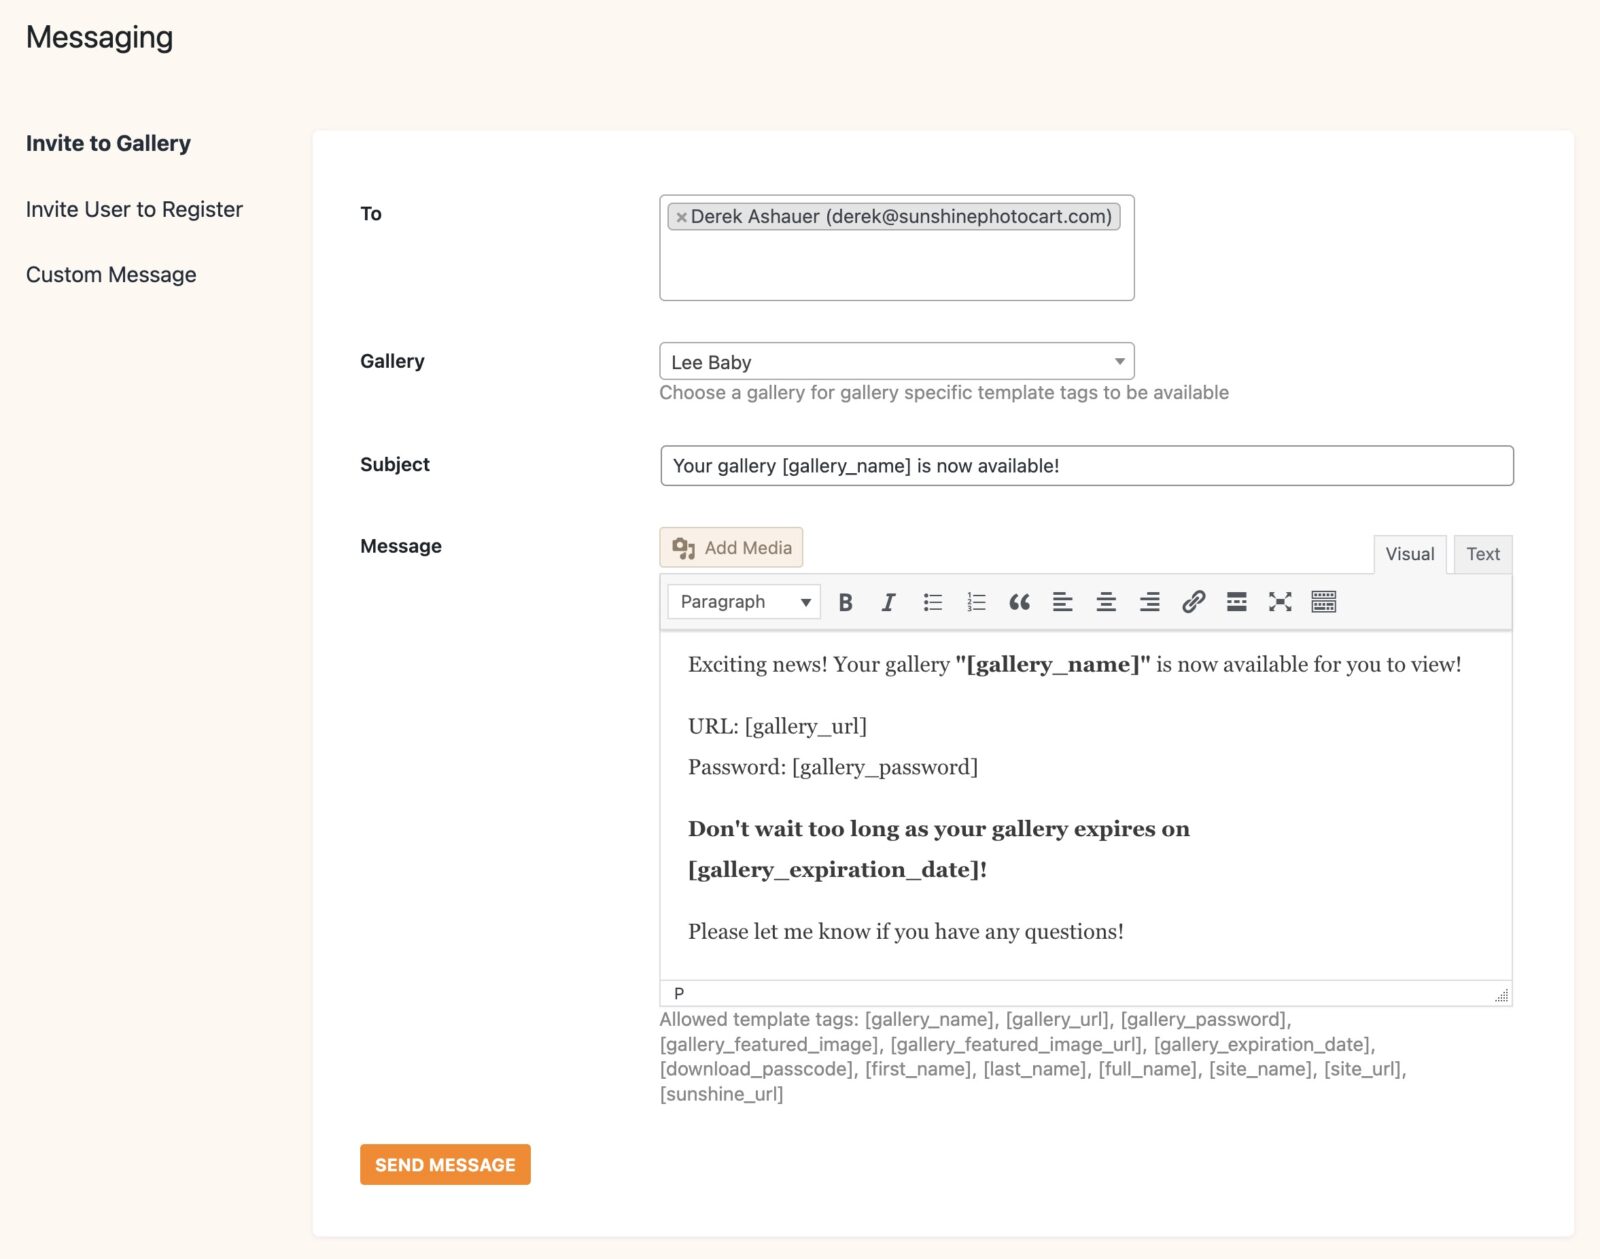
- Invite to gallery - Tell customers their gallery is now available to view
- Invite user to register - Ask a customer to register a new account on your site
Default message template
In Sunshine > Settings > Emails, you will find the 2 new email templates. Here you can define a default subject and message template for each email. When you begin to compose a new message, it will start off with the template you have defined but can be customized every time you send a message. This helps reduce the time to create emails you send repeatedly for each client.
Recipients
When sending messages, you can choose to send it to existing customers or any email addresses you wish. You can send to more than one recipient for each message, such as sending to both a bridge and groom.
Template tags
Template tags are placeholders which get replaced with content based on the options of the email and who it is being sent. For example, if you are sending a gallery invite email, the [gallery_name] template tag will be replaced with the name of the gallery selected when the email is sent.
You can find a list of the available template tags on the edit screen when sending a message or editing the default template.
Step 1
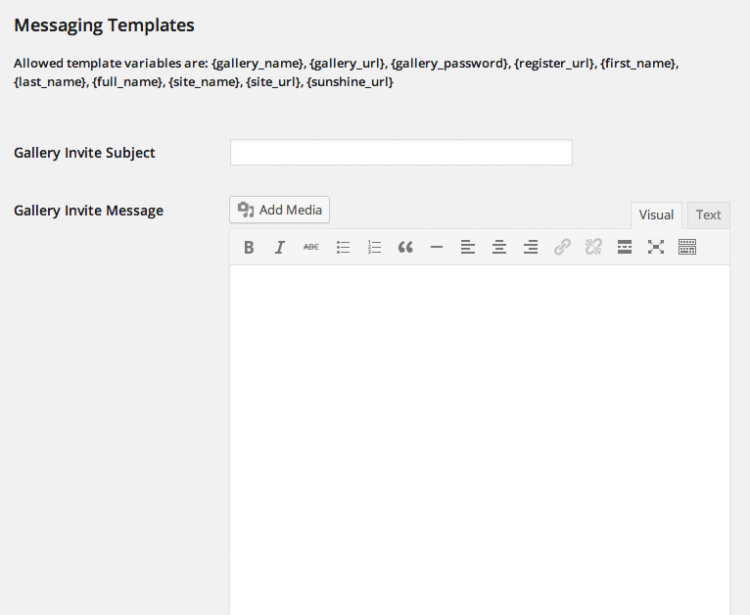
Go to Sunshine > Settings > Emails.
There are two template emails (subject and content) you can define: Gallery Invite and Registration Invite.
Enter a template subject and message for each. You can use the variables as outlined on the settings page. These variables will be replaced with real values based on which user and/or gallery you select.
Step 2
To send a new message, go to Sunshine > Messaging.
Step 3
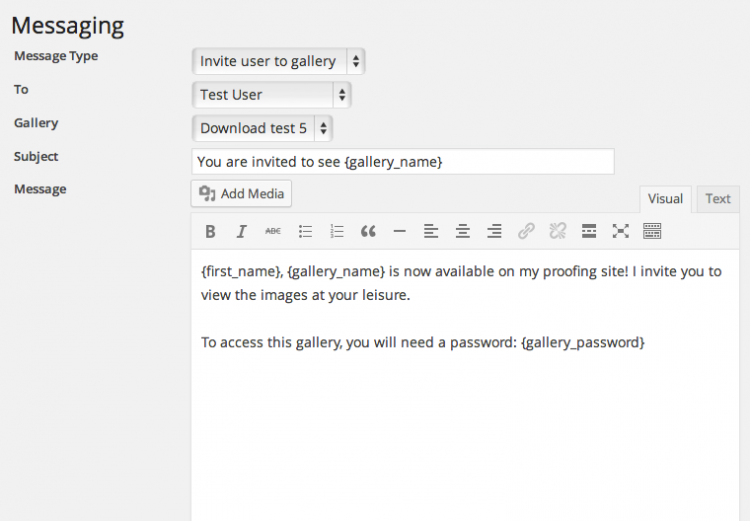
Select a message type: Basic Message, Invite User to Gallery or Invite User to Register.
Basic message uses no template, this is a free form message and simply another way to send an email to a user on your site without copying/pasting their email address into your email program.
Invite User to Gallery and Invite User to Register will automatically populate the subject and message visual editor with the content you have entered into the settings (see Step 1). This allows you to make any customizations to the message before sending to your user.
When you select "Other user", a new WordPress user account is not created for that user. This simply lets you send an email to someone who is not yet a user on your site.
For Pro users only.
Still need help?
If you have not yet found your answer in the documentation articles, please contact support