
How to create a new gallery
Sunshine Photo Cart makes creating galleries a breeze. Watch the following video or read the detail step-by-step instructions below.
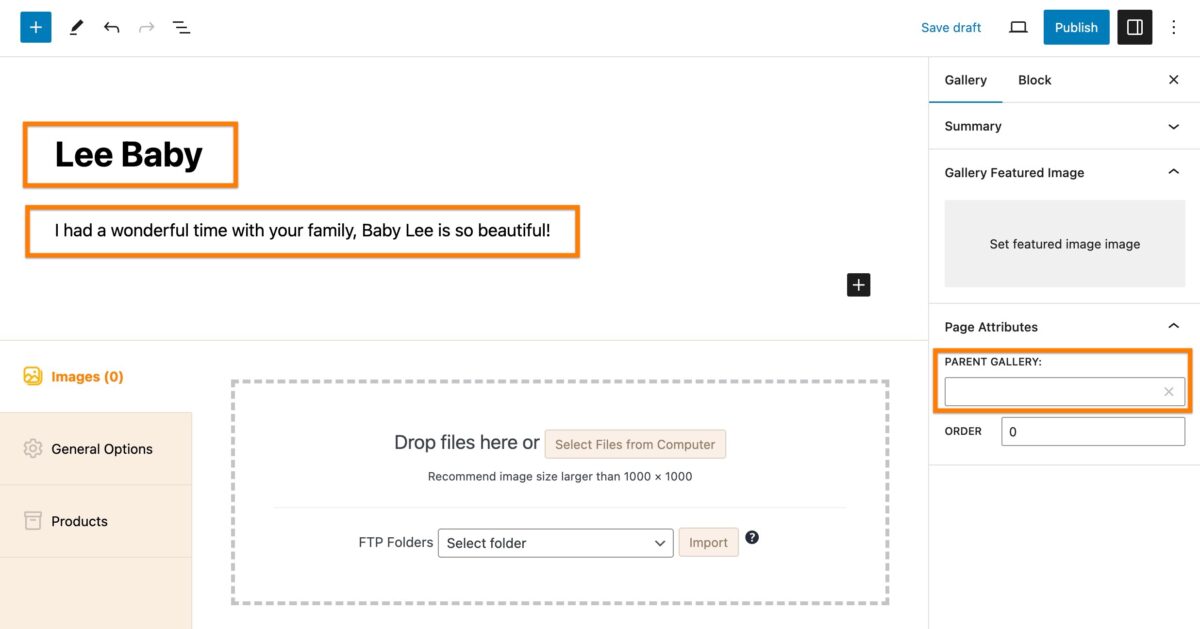
Basic Information
To create a new gallery in Sunshine Photo Cart, find the Galleries Tab and click on Add New.
Next, enter a name and optionally you can include any content you wish. You can also place this into a hierarchy of galleries by selecting a parent gallery.
Uploading Images
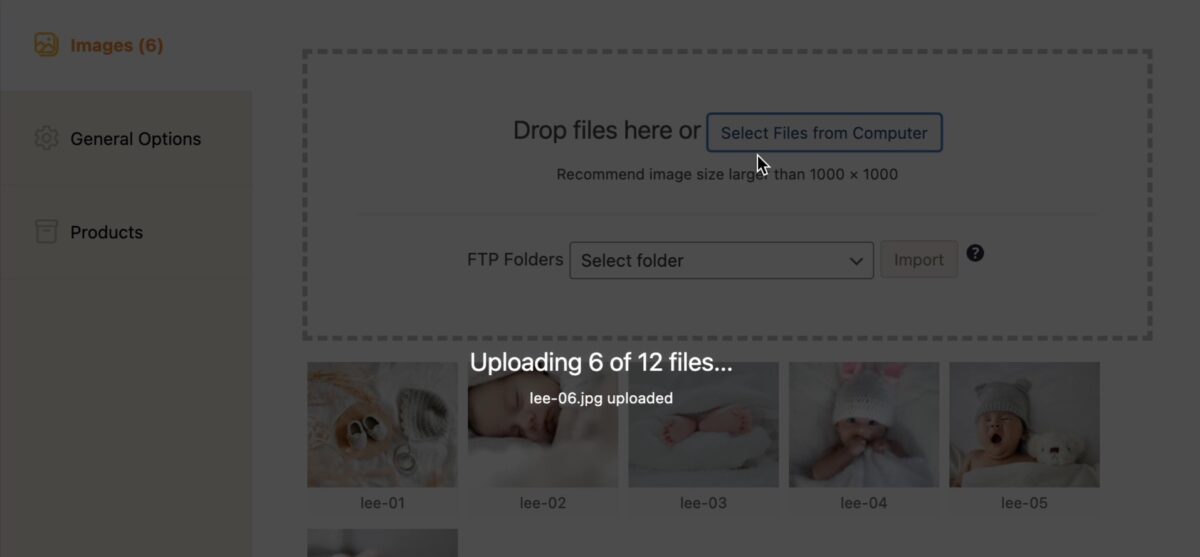
There are two ways to upload images: Via your browser (recommended) or FTP. Both options build the images in the gallery the same, but the browser method likely overall take you less time to get a gallery created because it requires less the steps and software needed.
Uploading via Browser
Click on the button "Select Files From Computer". You can then select the image files to be uploaded. The images will be uploaded and thumbnail versions created at this time and you will see the progress of this process.
Uploading via FTP
FTP, or File Transfer Protocol, is a standard method used to transfer files between your computer and your web hosting. It allows you to upload, download, and manage files easily, making it a common tool for managing websites and sharing large files. With Sunshine Photo Cart, you can first upload images via FTP to your web hosting account and use that as the source to build a gallery.
If you do not know what FTP is, it is highly recommend to stick to the Browser Upload method. FTP is for more advanced users who are already familiar with using it.
Where to Upload Files
- In your FTP program, find the root folder for your WordPress installation. Look for the "wp-config.php" file - that is your root WordPress folder.
- Then navigate to "wp-content/uploads/sunshine/upload"
- Create a new folder on your server. Name the folder anything you want, but it is recommended to not use any special characters.
- Upload your images to this folder
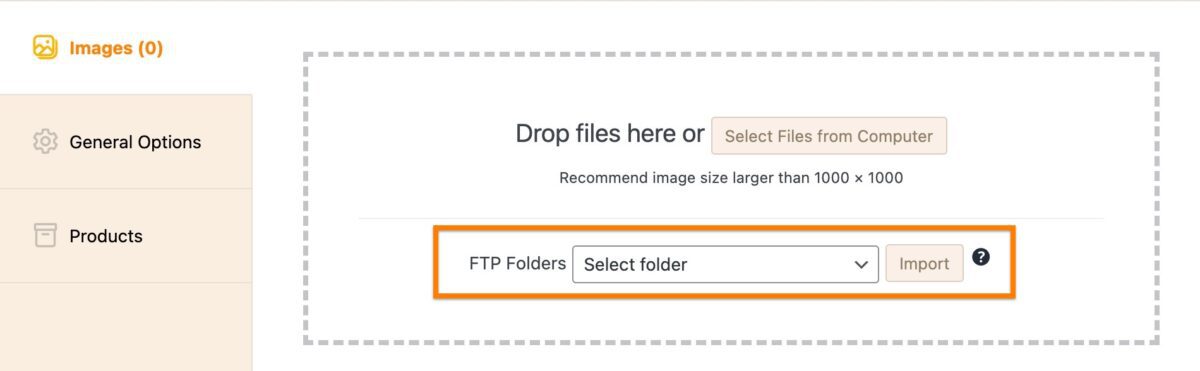
How to Select Folder as Source
In the "Images" tab, select your folder from the dropdown option:
Organizing Images
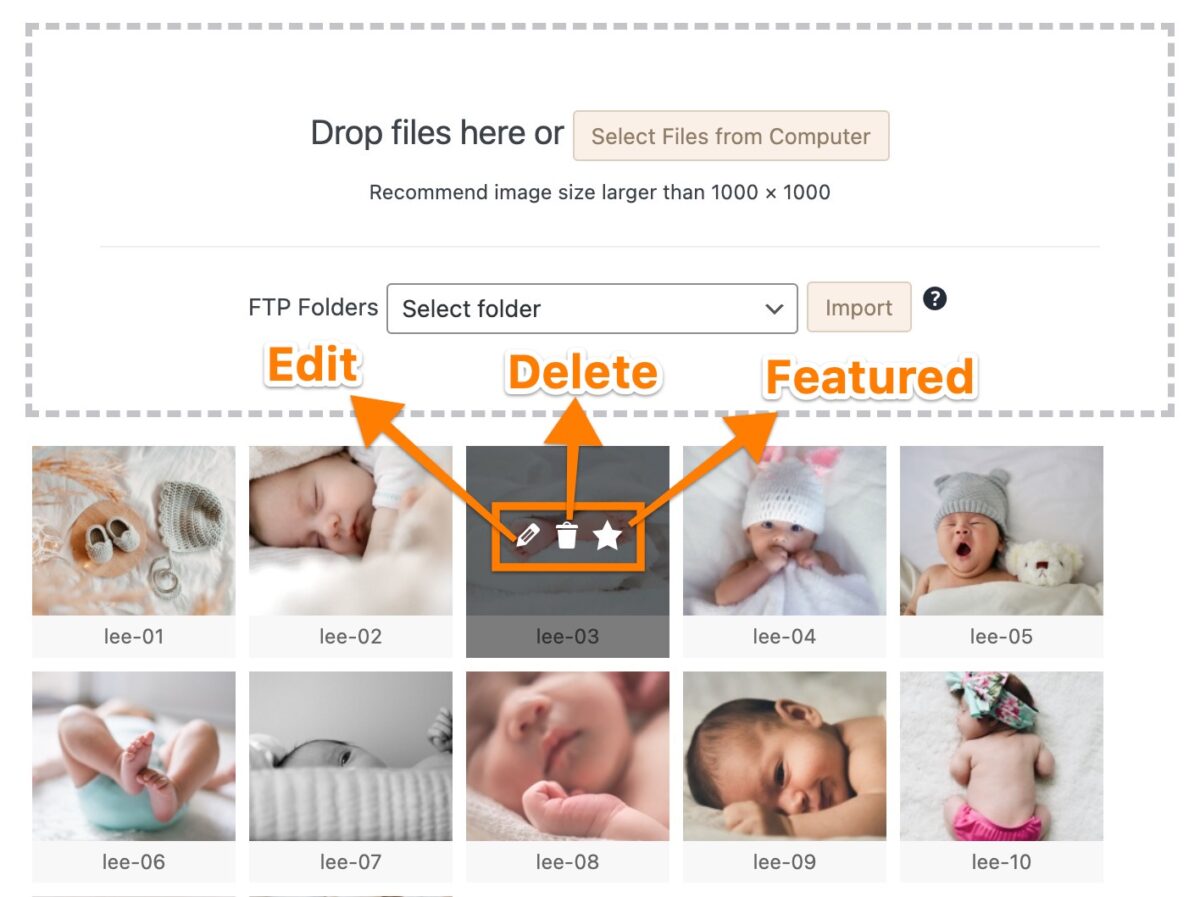
Once uploaded, you can now set one as the featured image, edit the image details, or delete it. If you do not set a specific featured image, the first image in the list is used.
You can also delete images in bulk by either selecting multiple images at once or clicking the “select all images” button and then clicking “delete selected images”
In order for manually sorting images to be available, you must have selected "Custom Ordering" in Sunshine > Settings > Sunshine > Display Options > Image Order. You can then manually sort images in a gallery by clicking on the thumbnail and dragging it into the order you would like.
General Options
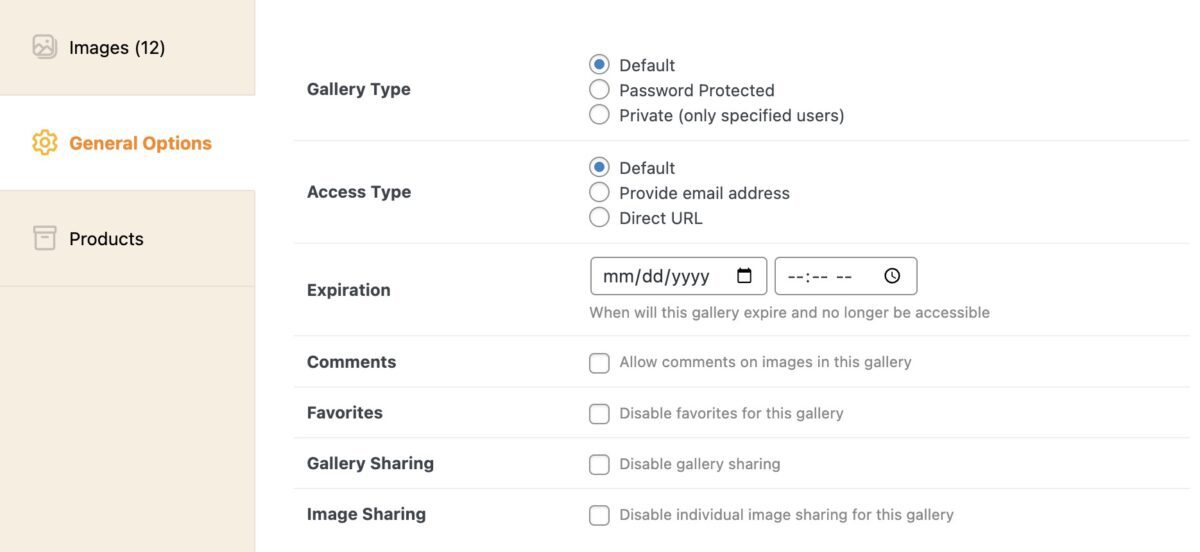
Gallery Type
A Default gallery type means it is open to the general public and anyone can view it.
Password protected requires the user enter a password before seeing images. You can optionally include a hint to help your customers.
Private galleries allow you to give strict access only to specific existing users, nobody else will be able to view the gallery.
Access Type
The Default access type adds no extra requirements for viewing the gallery.
Provide email address require customers to enter an email address before they can view images. If you use one of the email newsletter integrations like MailChimp or Campaign Monitor, the email address is subscribed to your list. You will also be able to see all the emails provided in this new tab.
Direct URL will remove the gallery from the main list and makes it accessible to anyone who visits the URL.
Expiration Date
You can also set an expiration date so the gallery will no longer be viewable after a specific day and time.
Comments
You can enable comments on individual images within the gallery and optionally require comments be approved before seen.
Favorites & Sharing
You can disable other gallery features like favorites and sharing for this gallery only.
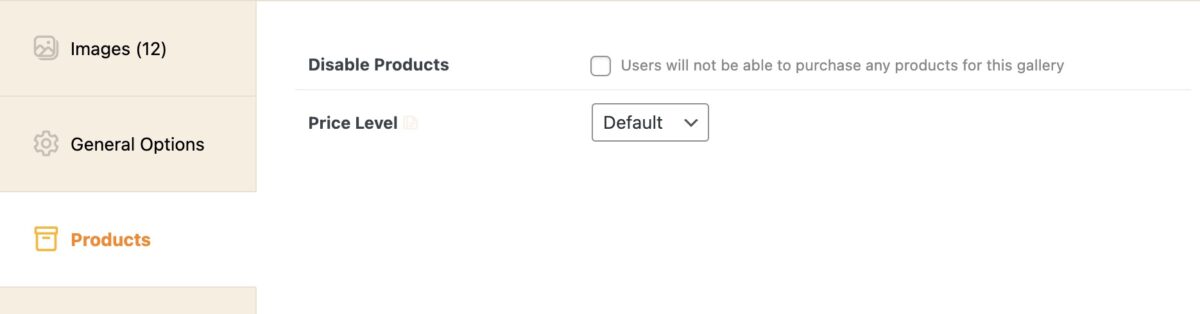
Products
In the Products tab, you can completely disable all products for the gallery effectively making this a proofing only gallery.
With the Price Levels add-on enabled, you can select one of your various price levels you have created.
Featured Image
By default the main/default/featured image for a gallery is the first one in the list. You can also custom select an image from the gallery or upload a separate image.
Select Featured Image
In viewing the gallery thumbnails, you can hover over the one you want and click the star icon to mark it as the Featured Image.
Upload Featured Image
In the right sidebar, you can upload a separate image in the Featured Image section.
Still need help?
If you have not yet found your answer in the documentation articles, please contact support